Tutorial: recolor a jacket
In this tutorial you turn the Rocker’s Heart crystaljock bomber blue and wear it in the game. You click through it yourself: no coding, no AI, no paid key. These are the steps EDGEmat’s own recolor test follows, on the same jacket.
| Time | About 20 minutes, half of it the game starting |
| Before you start | EDGEmat and REDcode are installed, and Game Materials has built its list (Install and set up). The game is closed |
| You also need | REDnode 0.49.5 or later in the game. Its Console gives V the jacket in step 7 |
| Rather ask Claude? | Recolor a jacket with EDGEchat makes the same kind of mod by chat |
| On this page | |
|---|---|
| 1. Make a project | The folder your mod lives in |
| 2. Find the jacket | By its in-game name |
| 3. Pick the biggest layer | The part that decides the jacket’s color |
| 4. Make it blue | One click, with undo |
| 5. Look at it in 3D | Optional |
| 6. Save it into the project | For both body types |
| 7. Into the game | Pack, install, wear |
| What to look for | And what to do if it isn’t blue |
| Put it back, Try next |
Three words first. A garment’s color lives in its setup, a small file with a stack of layers: leather, trim, stitching and so on. Each layer has a surface (the kind of stuff) and a color from that surface’s own list. You change one layer’s color, and EDGEmat saves a changed copy of the setup into your project. The game’s own files are never touched.
1. Make a project
A project is a folder that holds your mod’s files until they are packed into a mod.
- Open the command palette (
Ctrl+Shift+P) and run REDcode: New Project. - Name it
my_materials. Small letters and no spaces keep the game happy. - Choose a folder to create it in, anywhere outside the game folder.
| What you should see | |
|---|---|
| VS Code | Opens the new folder |
| REDcode’s Project view | The project, with Archive, Raw, Resources and Packed under it |
Leave the project open. EDGEmat saves into the project REDcode has open.
2. Find the jacket
- Click EDGEmat’s icon in the activity bar, the strip of icons down the left edge of VS Code.
- Click the FIND header, at the bottom of EDGEmat’s sidebar, then Find… (or the magnifier that shows when you hover the header).
- Type
rocker's heartand press Enter. - Under Items, unfold Rocker’s Heart crystaljock bomber. Two rows open under it, Feminine body and Masculine body, each with a mesh (the jacket’s 3D shape for that body) and the mesh’s materials.
- Under either body, click the material black_red_glossy. It has a stacked-sheets icon and the grey text multilayered.
| What you should see | |
|---|---|
| After step 3 | A count line at the top of Find, and the jacket under Items. The first search takes a few seconds |
| After step 4 | The meshes t2_084_pwa__short_sleeves.mesh (feminine) and t2_084_pma__short_sleeves.mesh (masculine) |
| After step 5 | The setup editor opens in a tab: a color map on the left and the list of layers on the right. Under the title it says “Select a layer to change it.” |
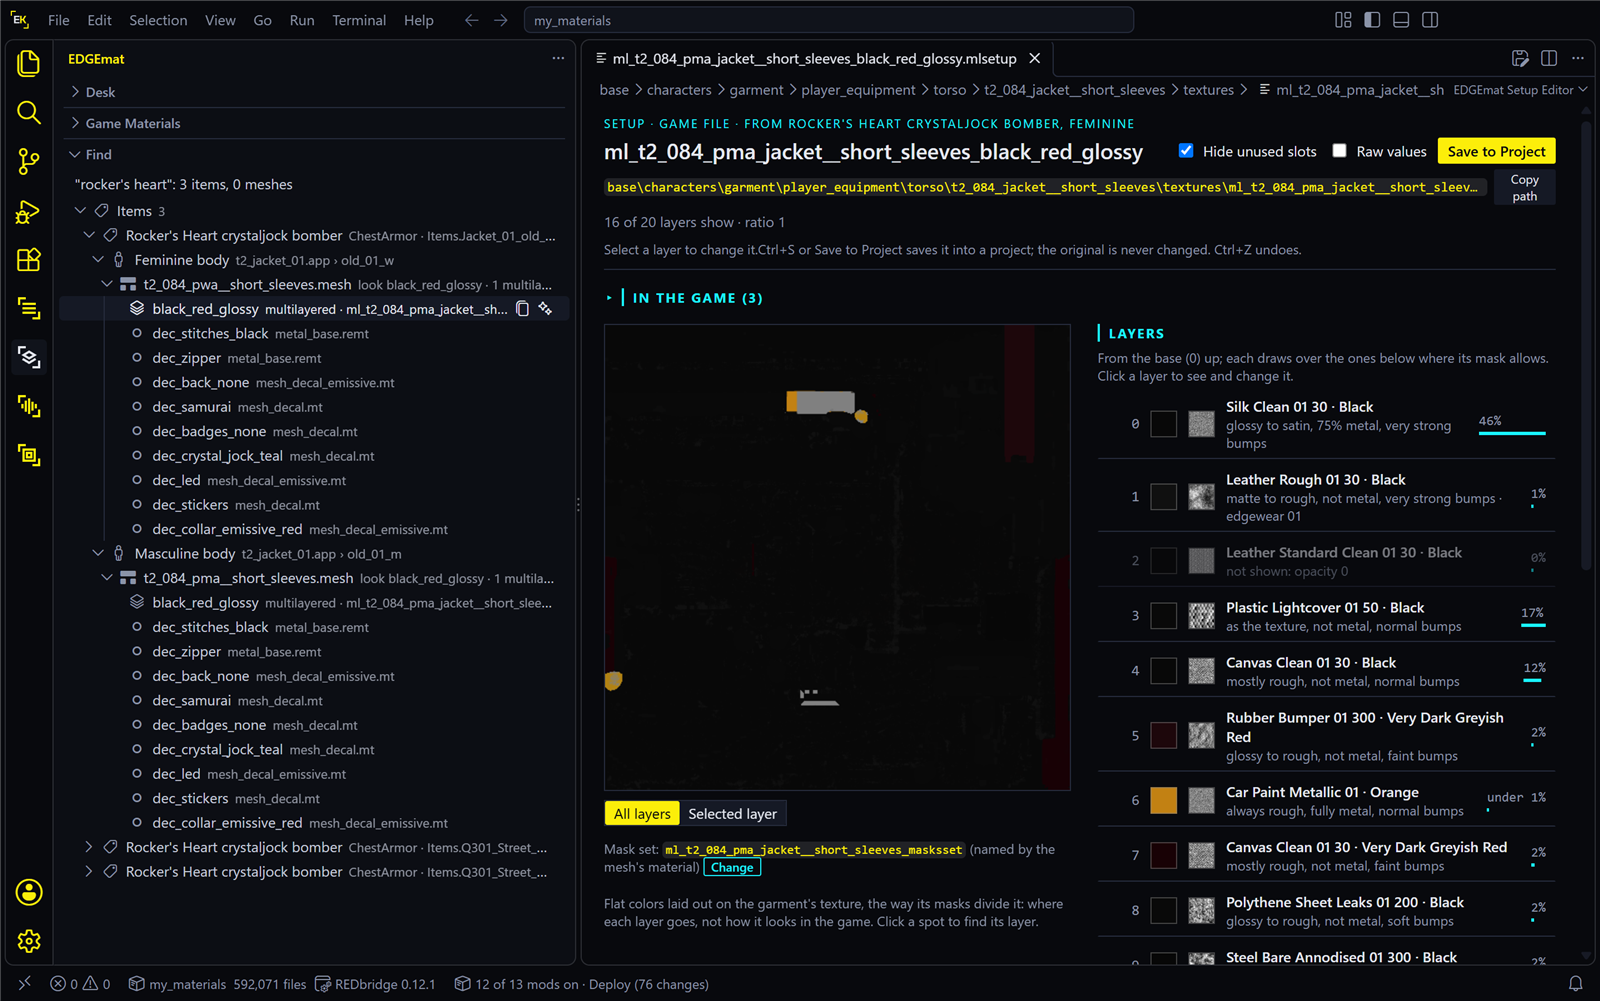
Now find out what the game calls this jacket. Near the top of the setup editor, click the ▸ beside In the game. The first time, EDGEmat reads every clothing item, which takes about ten seconds. It then lists the items that wear this look, each with a command and a Copy button. For this jacket the command is:
addItem("Items.Jacket_01_old_01")
You need it in step 7.
3. Pick the biggest layer
Each layer in the list has a bar that shows its share: how much of the jacket it covers. The layer with the longest bar decides the jacket’s main color.
Click that layer.
| What you should see | |
|---|---|
| In the list | The layer opens. It shows its surface, a Color row with a filter box and a grid of color swatches (the current one outlined), and drop-downs for roughness, metal and bumps |
| On the map | Press Selected layer under the map: the rest dims and this layer’s area lights up. That is the part of the jacket you are about to change |
4. Make it blue
- In the Color row, type
bluein the filter box. The grid narrows to this surface’s blues. - Click a strong blue swatch.
| What you should see | |
|---|---|
| The layer | Blue in the list and on the map, at once |
| The tab | A dot appears on it, VS Code’s sign for unsaved changes. The page says “Edited, not saved yet.” |
Changed your mind? Click an empty part of the page, then press Ctrl+Z to undo and Ctrl+Y to redo. Keep it blue for now: it is what you look for in the game.
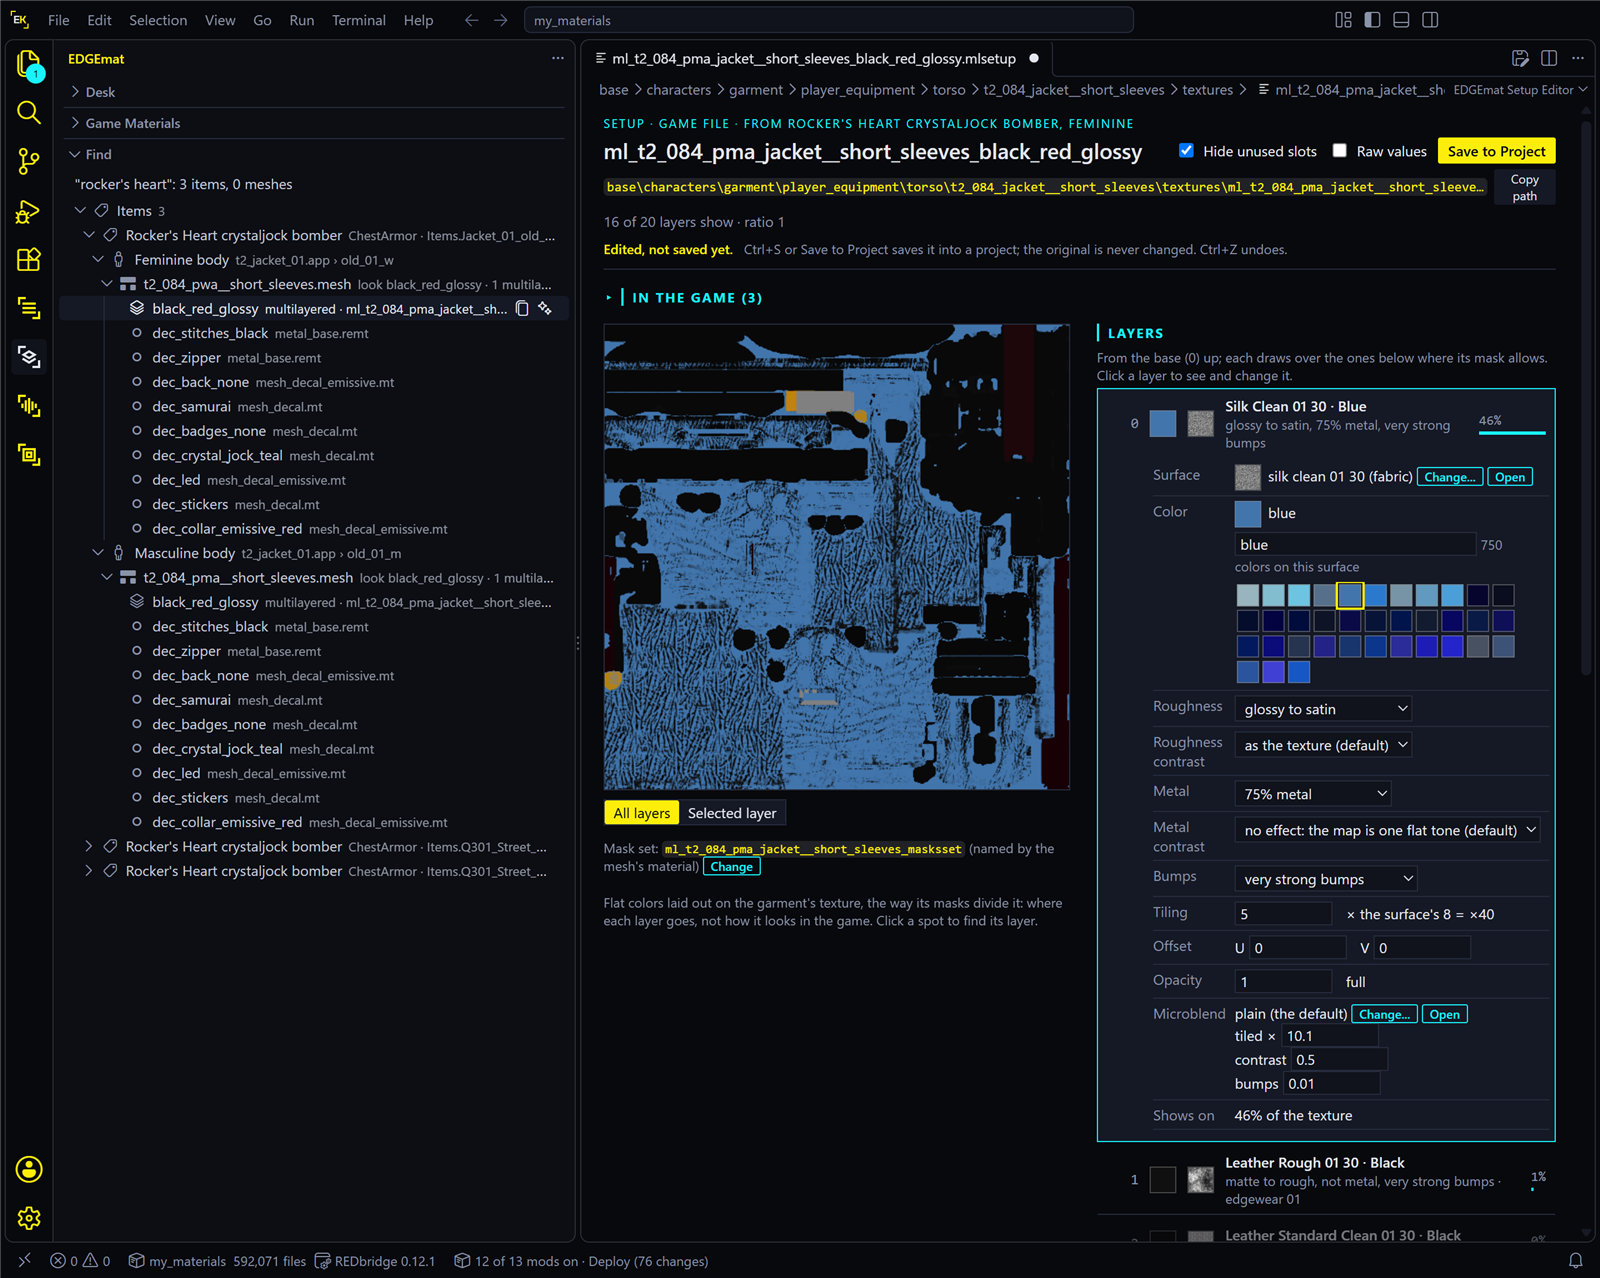
Only the colors this surface offers are in the grid. That is how the game works: see Colors come from a list.
5. Look at it in 3D
Optional. In Find, hover the mesh row t2_084_...__short_sleeves.mesh and click the eye (View in 3D). REDcode opens the jacket in a new tab. The status bar at the bottom of VS Code names the look to pick, black_red_glossy: choose it in the viewer’s Appearance list. Drag to turn the jacket.
The 3D view shows your blue before you save, and follows each further change within about a second. It shows each layer’s surface and grain in its color, but no shine, bumps or the game’s lighting yet, so the game will look richer. More: View in 3D.
6. Save it into the project
- Go back to the setup editor’s tab and press Save to Project, the button at the top right.
Ctrl+Sdoes the same. - A list opens, titled “Save to Project: my_materials”. Choose As a new setup (recommended).
- A box shows the new file’s name, ending in
_my_materials.mlsetup. Press Enter to accept it. - EDGEmat looks for the meshes that use this setup, and lists
t2_084_pma__short_sleeves.meshandt2_084_pwa__short_sleeves.mesh, both ticked. Leave both ticked and press Enter. Two meshes means both body types get the recolor.
| What you should see | |
|---|---|
| A message | “Saved into my_materials: the setup and 2 meshes pointed at it.”, with the buttons Pack and Play and Open the Saved Setup |
| The tab | The unsaved dot is gone, and a line under the title says where the setup was saved |
| REDcode’s Project view | Under Archive, a folder path ending in t2_084_jacket__short_sleeves with the two meshes, and a textures folder with your new setup |
What happened: EDGEmat saved your blue setup under a new name, and copied the jacket’s two mesh files into the project, changed to use it. That is all the game needs. No helper mod is required.
Don’t press Pack and Play yet: the next step does it with the game closed.
7. Into the game
- Make sure the game is closed. In REDcode’s Project view, press Pack and Install (the rocket in the view’s title bar).
- Press Run Game (the play triangle beside it), and load a save.
- Press F10, click the REDNODE tab and switch on Console.
-
Click in the line at the bottom of the Console, type the command from step 2 and press Enter:
addItem("Items.Jacket_01_old_01") - Press Esc, open the inventory and equip the jacket.
- Look at V in photo mode (the N key by default), or in a mirror.
| What you should see | |
|---|---|
| After step 1 | REDcode packs the project and installs it. The file my_materials.archive is now in the game’s archive\pc\mod folder |
| After step 4 | The Console answers 1 × Items.Jacket_01_old_01 added |
| After step 6 | The jacket on V, with its biggest area in your blue |
What to look for
| Look at | You should see |
|---|---|
| The big panels | Your blue. Under the game’s lighting it looks a little different from the swatch |
| The other layers | Trim, stitching and prints as they were: you changed one layer |
| V’s arms in first person | Blue sleeves too |
| If | Do this |
|---|---|
| The jacket still has the game’s colors | Check that you equipped the jacket the command gave you, not another bomber. Then see If you don’t see your change |
| The Console isn’t in the launcher | It needs REDnode 0.49.5 or later: update REDnode |
| Save to Project found no mesh, or only one | See Troubleshooting |
Put it back
Your mod is one file, so taking it out is simple. In REDcode’s Project view, open the ... menu and choose Uninstall. The jacket has the game’s colors again the next time the game starts. Your project stays as it is, and Pack and Install puts the mod back. More: Uninstall.
Try next
- Another color, or another layer. Open the saved setup: in REDcode’s Project view, right-click the new
.mlsetupfile and choose Open Material in EDGEmat…. Change it and pressCtrl+S: it now saves straight into the project, with no questions. Then Pack and Install again. - Another surface. In a layer’s Surface row, Change… swaps leather for denim, chrome or anything else in the game. See Changing a layer.
- Several versions side by side. Put a garment on the Desk and try two colors before you choose one.
- Stay in the game while you work. With REDnode, REDcode can swap each new version in without a restart: Keep the game running.
- A material the game doesn’t have. Tutorial: worn leather makes one from a line of words.