Your first scene
This page takes you through EDGEbuilder once, start to finish. You’ll build a small stack of crates, copy it, and bake it into the world, so the crates stand in Night City and stop V even with EDGEbuilder closed. It takes about 20 minutes, plus two game restarts.
The other pages explain each control in full. Here you only need to follow the steps.
Before you start
| You need | Where to get it |
|---|---|
| EDGEbuilder installed, with REDbridge allowed | Install and set up |
| A save where V stands somewhere quiet and open: an empty lot, a car park, a quiet alley | Your own saves. Busy streets work too, but traffic gets in the way |
| For the bake at the end: REDcode in VS Code, with a project open | REDcode projects. Any project will do, even a new empty one |
Press F10 until REDnode’s windows take the mouse (the overlay is interactive), and open EDGEbuilder from the launcher.
1. Check the three pills
At the top of EDGEbuilder’s panel, three pills say whether everything is ready:
- The first says World ready. If it says Load a save, load one.
- The second says REDbridge and its version, in green. If it says Allow REDbridge (hover), see Allow REDbridge.
- The third counts the game’s assets, about 31,500 assets. The first time, it says Indexing… for a few seconds.
When all three are green, you’re ready.
2. Make a scene
A scene is the list of everything you place. EDGEbuilder saves it after every change, so you never lose work. Give your first one a name.
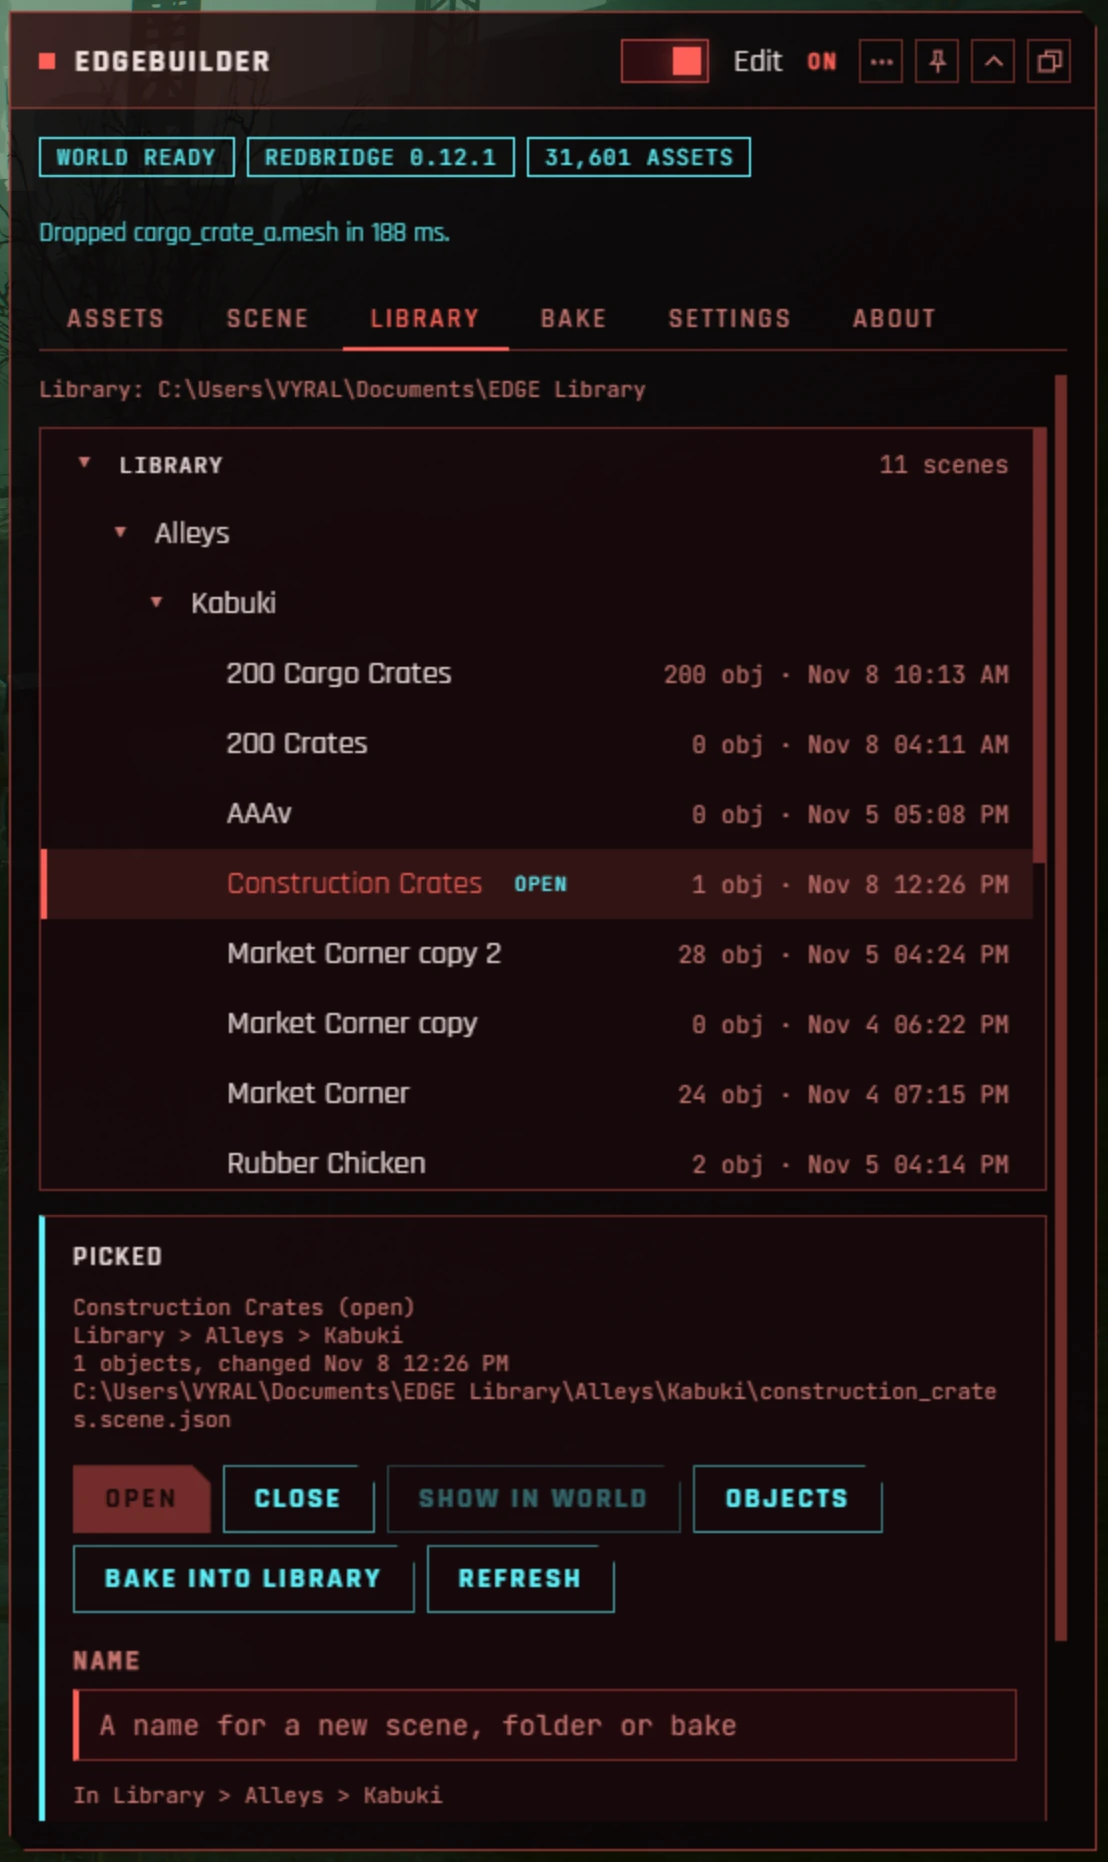
- Open the Library tab.
- If it says No Library folder yet, press Make the Library. That makes
Documents\EDGE Library, a folder the EDGE tools share for your work. (You can skip it: pick This PC in the tree instead, and the scene is kept in EDGEbuilder’s own folder.) - Click Library in the tree, so new things go there.
- In the Picked panel, type
Construction Cratesin Name. - Press New scene here.
The message line says New scene Construction Crates in Library, and the scene shows in the tree with an open tag. The Scene tab now has it as Open scene’s name.
3. Find a crate and drop it
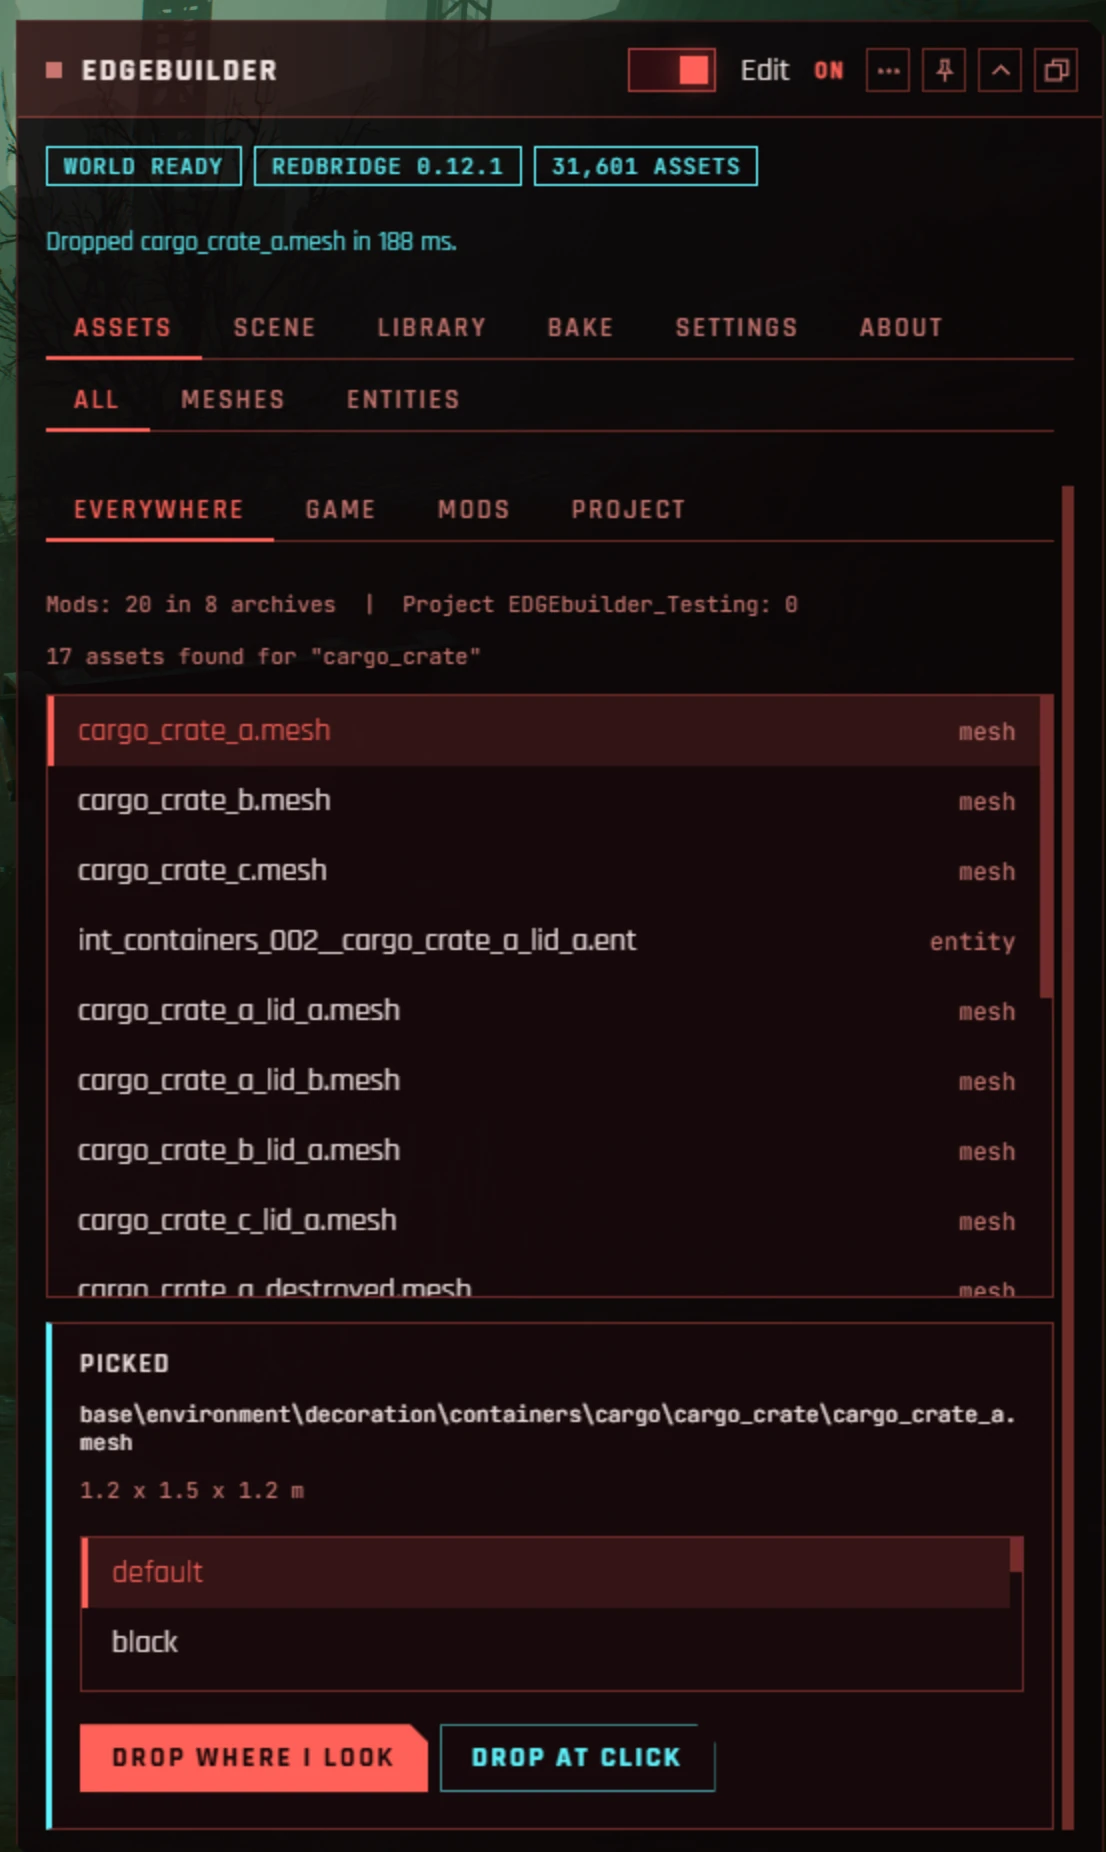
- Open the Assets tab and type
cargo crate. Typing anywhere on the tab goes into the search box. - Click the Meshes tab above the results, so only meshes are listed. A mesh is a plain 3D model: it has a look, but no behaviour of its own.
- Click
cargo_crate_a.meshin the list. The Picked panel shows its size in metres and its appearances, the colours and labels the same crate comes in. - Click an appearance you like.
- Press Drop where I look.
The crate lands about 3 m in front of V, facing V. The message line says how long it took, for example Dropped cargo_crate_a.mesh in 412 ms., and the Scene tab opens with the crate selected. The game draws its outline around it.
What you see is a preview: a stand-in EDGEbuilder places in the running game while you build. You’ll make the crates permanent in step 10.
4. Switch Edit on and fly
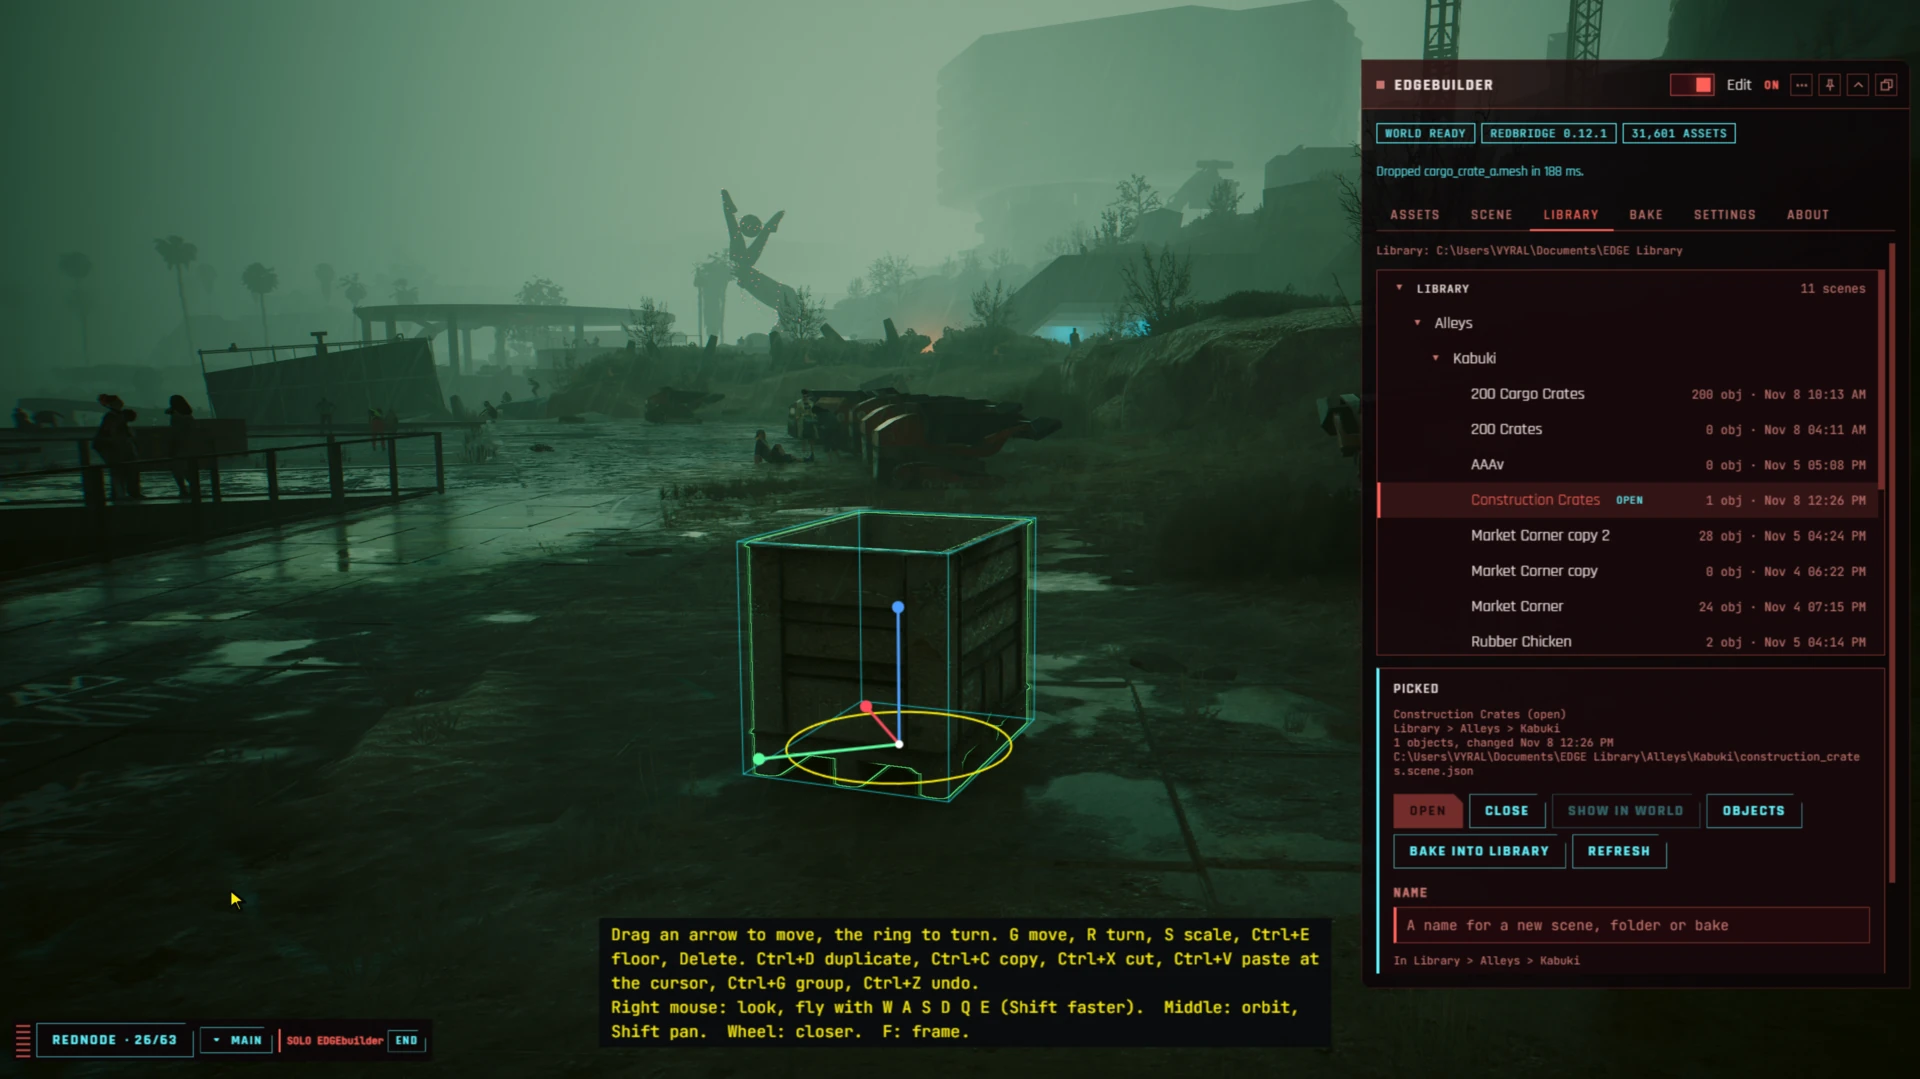
- Turn on the Edit switch at the right end of the panel’s title bar.
The view changes to EDGEbuilder’s own camera, the game’s HUD goes away, and V stays where V stood. The screen goes very slightly darker: the mouse now works in the world, not in the game.
- Hold the right mouse button and move the mouse to look around.
- Still holding it, press W, A, S, D to fly, and E to rise. Hold Shift to go faster.
- Fly up a few metres and look down at the crate.
A help line at the bottom of the screen always says what you can do next.
5. Move the crate
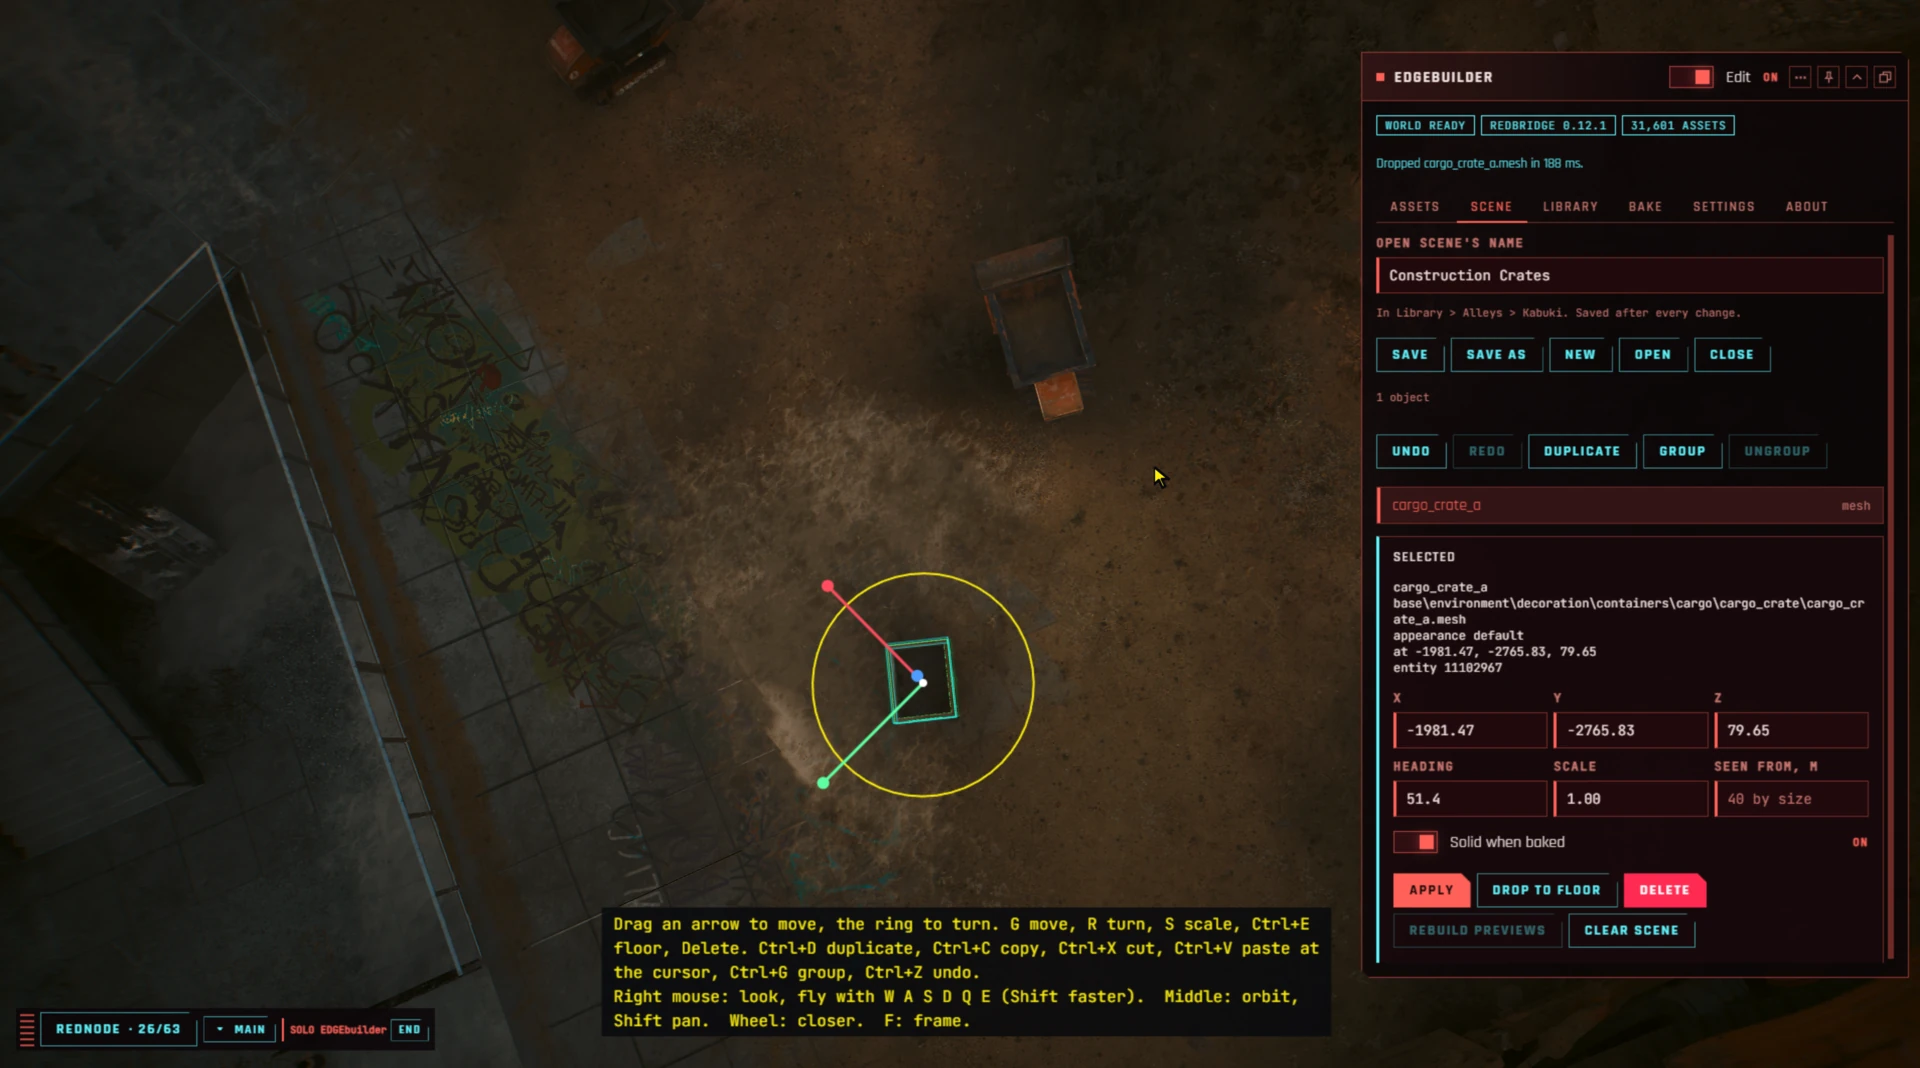
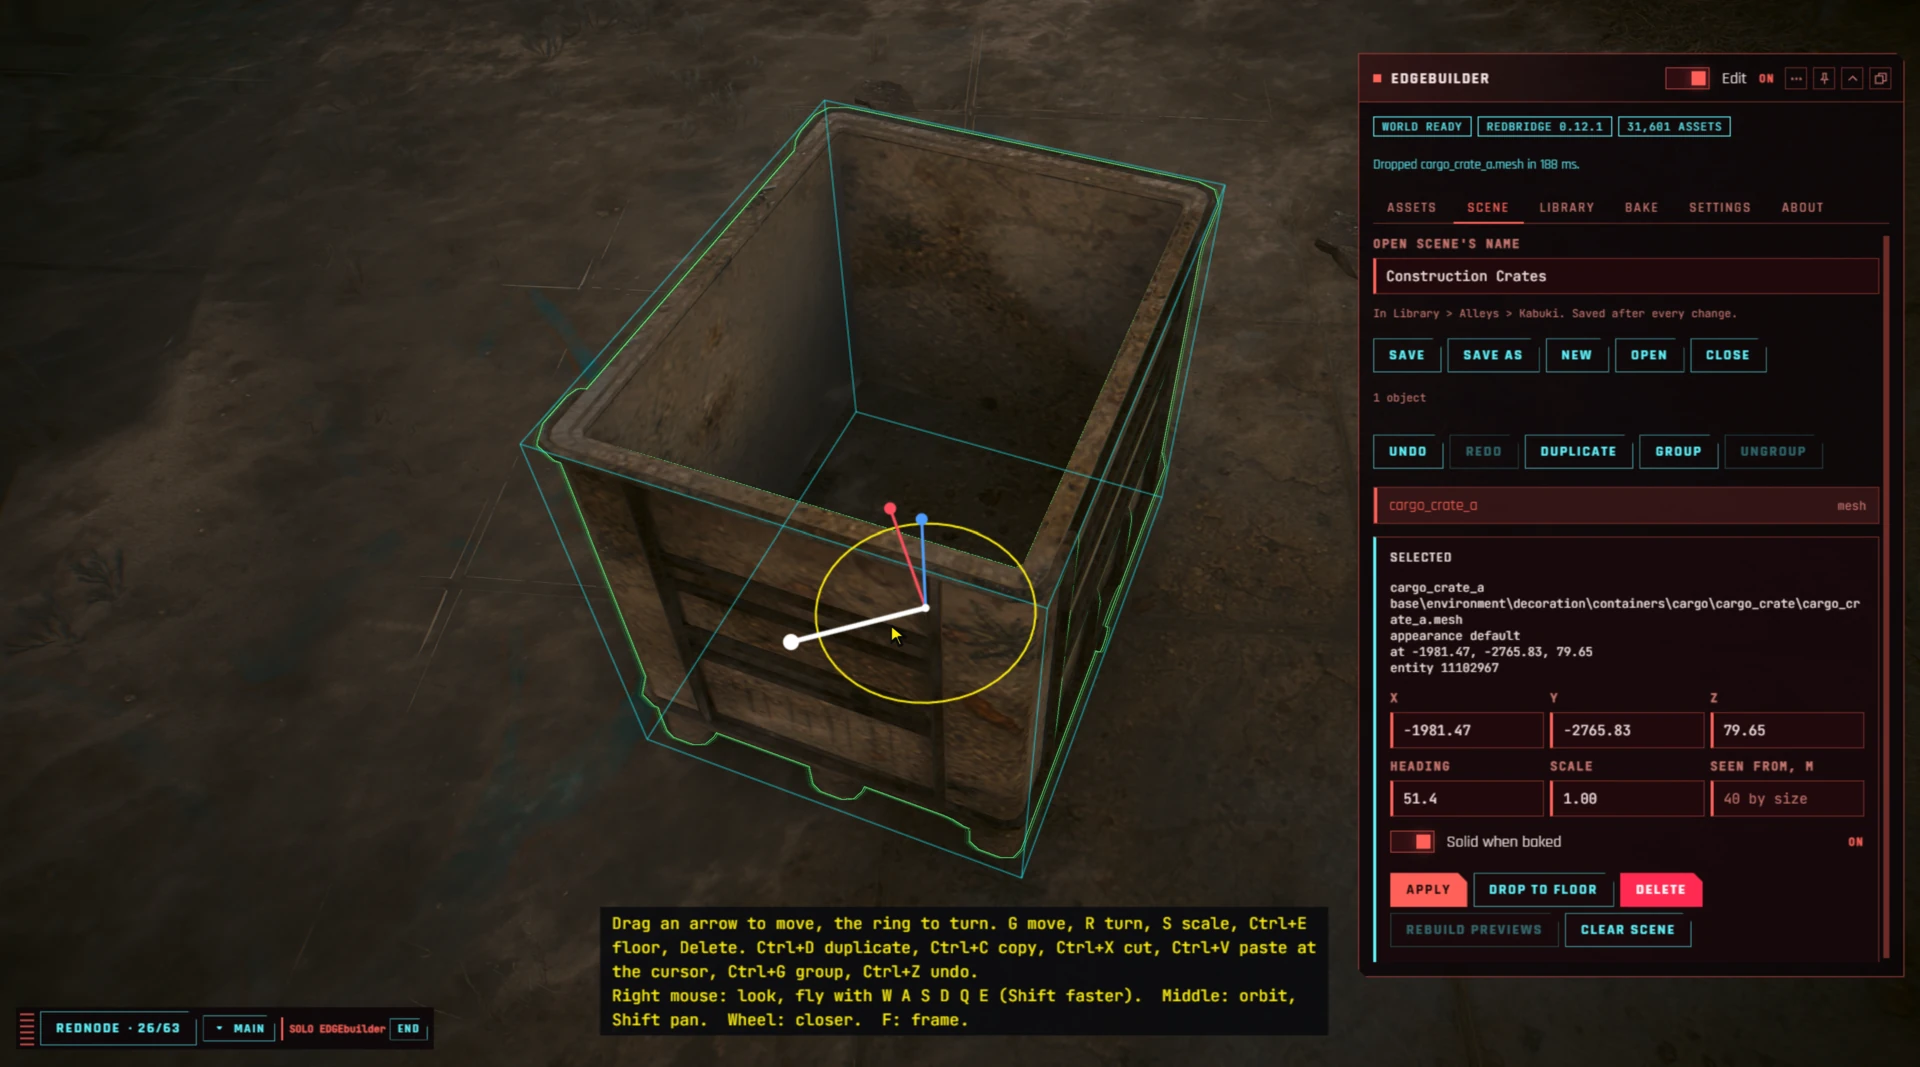
The selected crate has a gizmo: red, green and blue arrows, and a yellow ring.
- Click the crate if it isn’t selected.
- Drag the red arrow. The crate slides along it. Let go to keep it there.
- Drag the yellow ring to turn the crate. Hold Ctrl while you drag and it turns in 15° steps.
- Now with keys: press G (the crate follows the mouse), then Z (only up and down), type
2, and press Enter. The crate rises exactly 2 m. - Press Ctrl+E. The crate drops back onto the ground.
If you get it wrong, Esc or a right-click puts the crate back while you’re still moving it. After that, Ctrl+Z undoes it.
6. Make a small stack
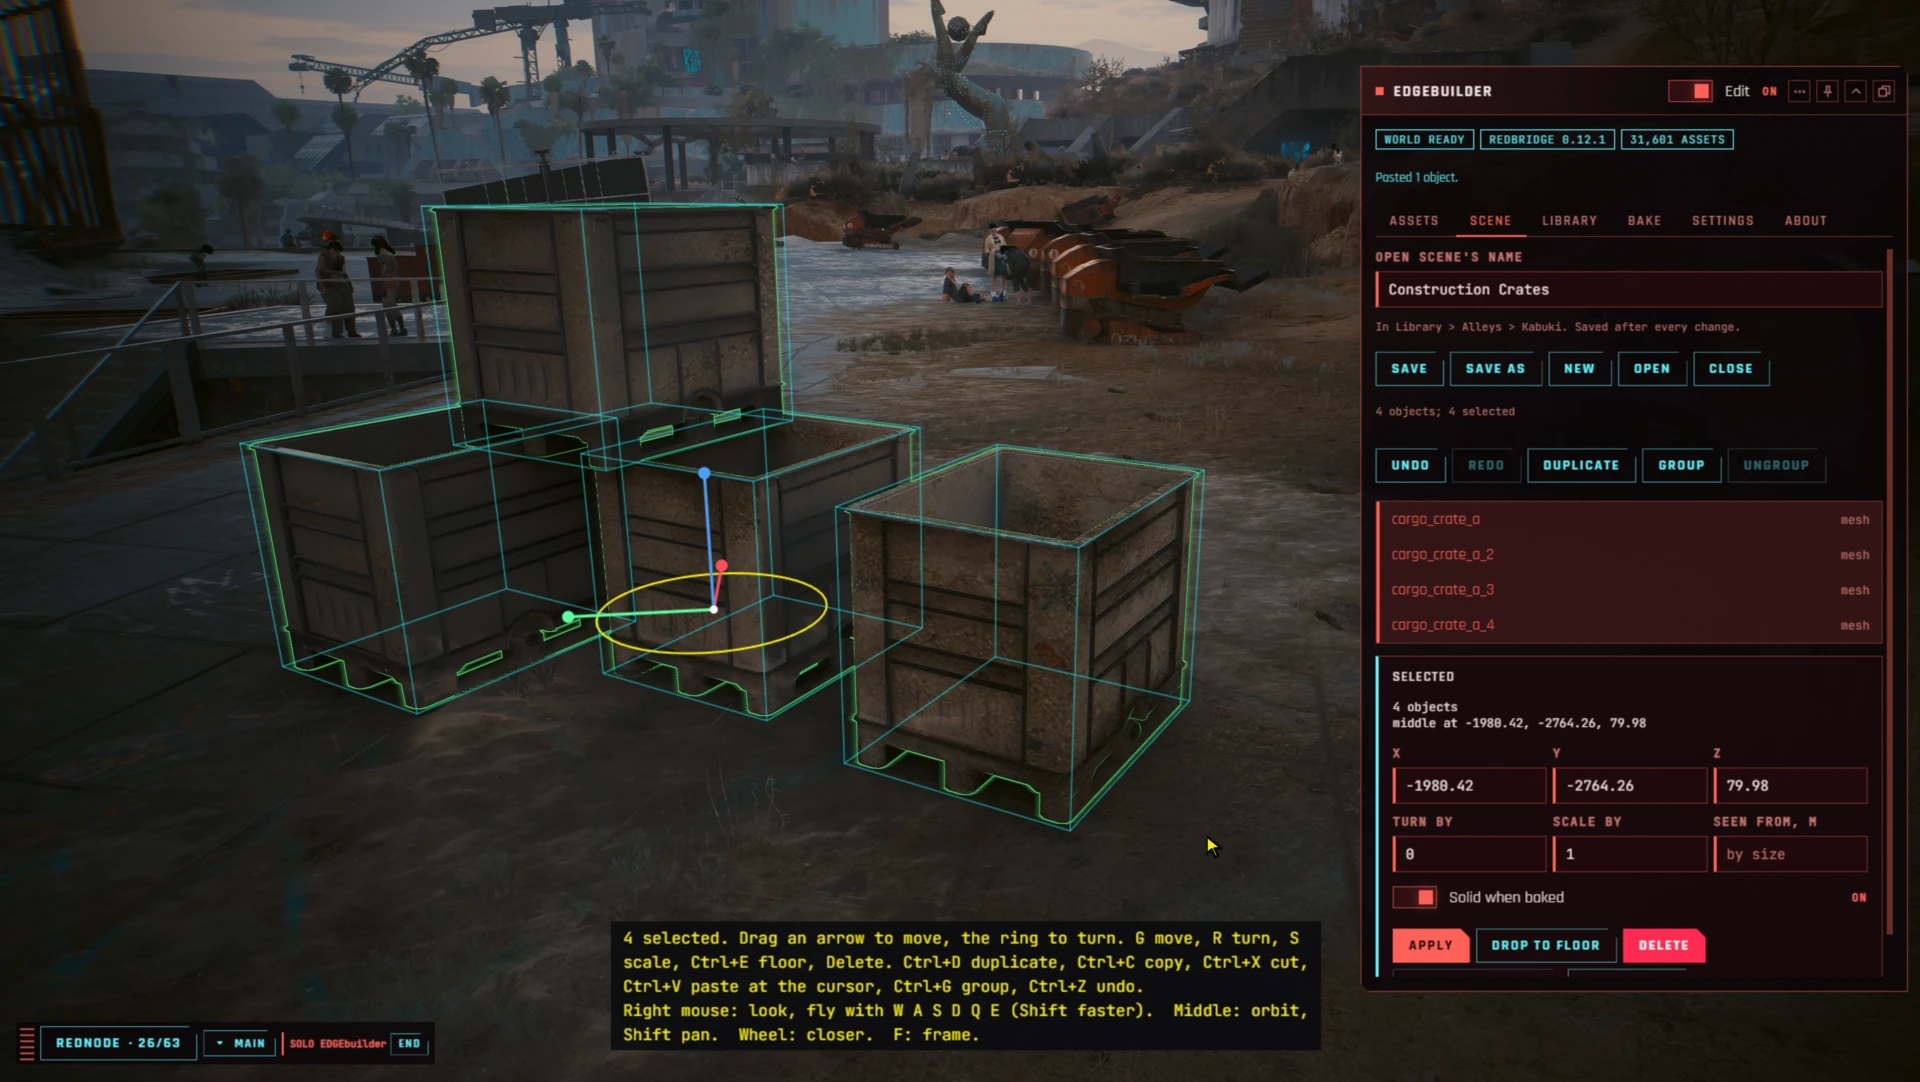
- With the crate selected, press Ctrl+D. A copy follows the mouse.
- Move it beside the first crate and click to put it down.
- Press Ctrl+D again and put a third crate beside the others.
- For a fourth on top: press Ctrl+D, click to put it on the ground near the others, then press G, Z, type the crate’s height and press Enter. The Picked panel on the Assets tab gave the height as the last of the three sizes, about
1m. Then drag its red and green arrows until it sits on the crates below.
7. Group the stack and name it
A group keeps objects together, so one click picks them all.
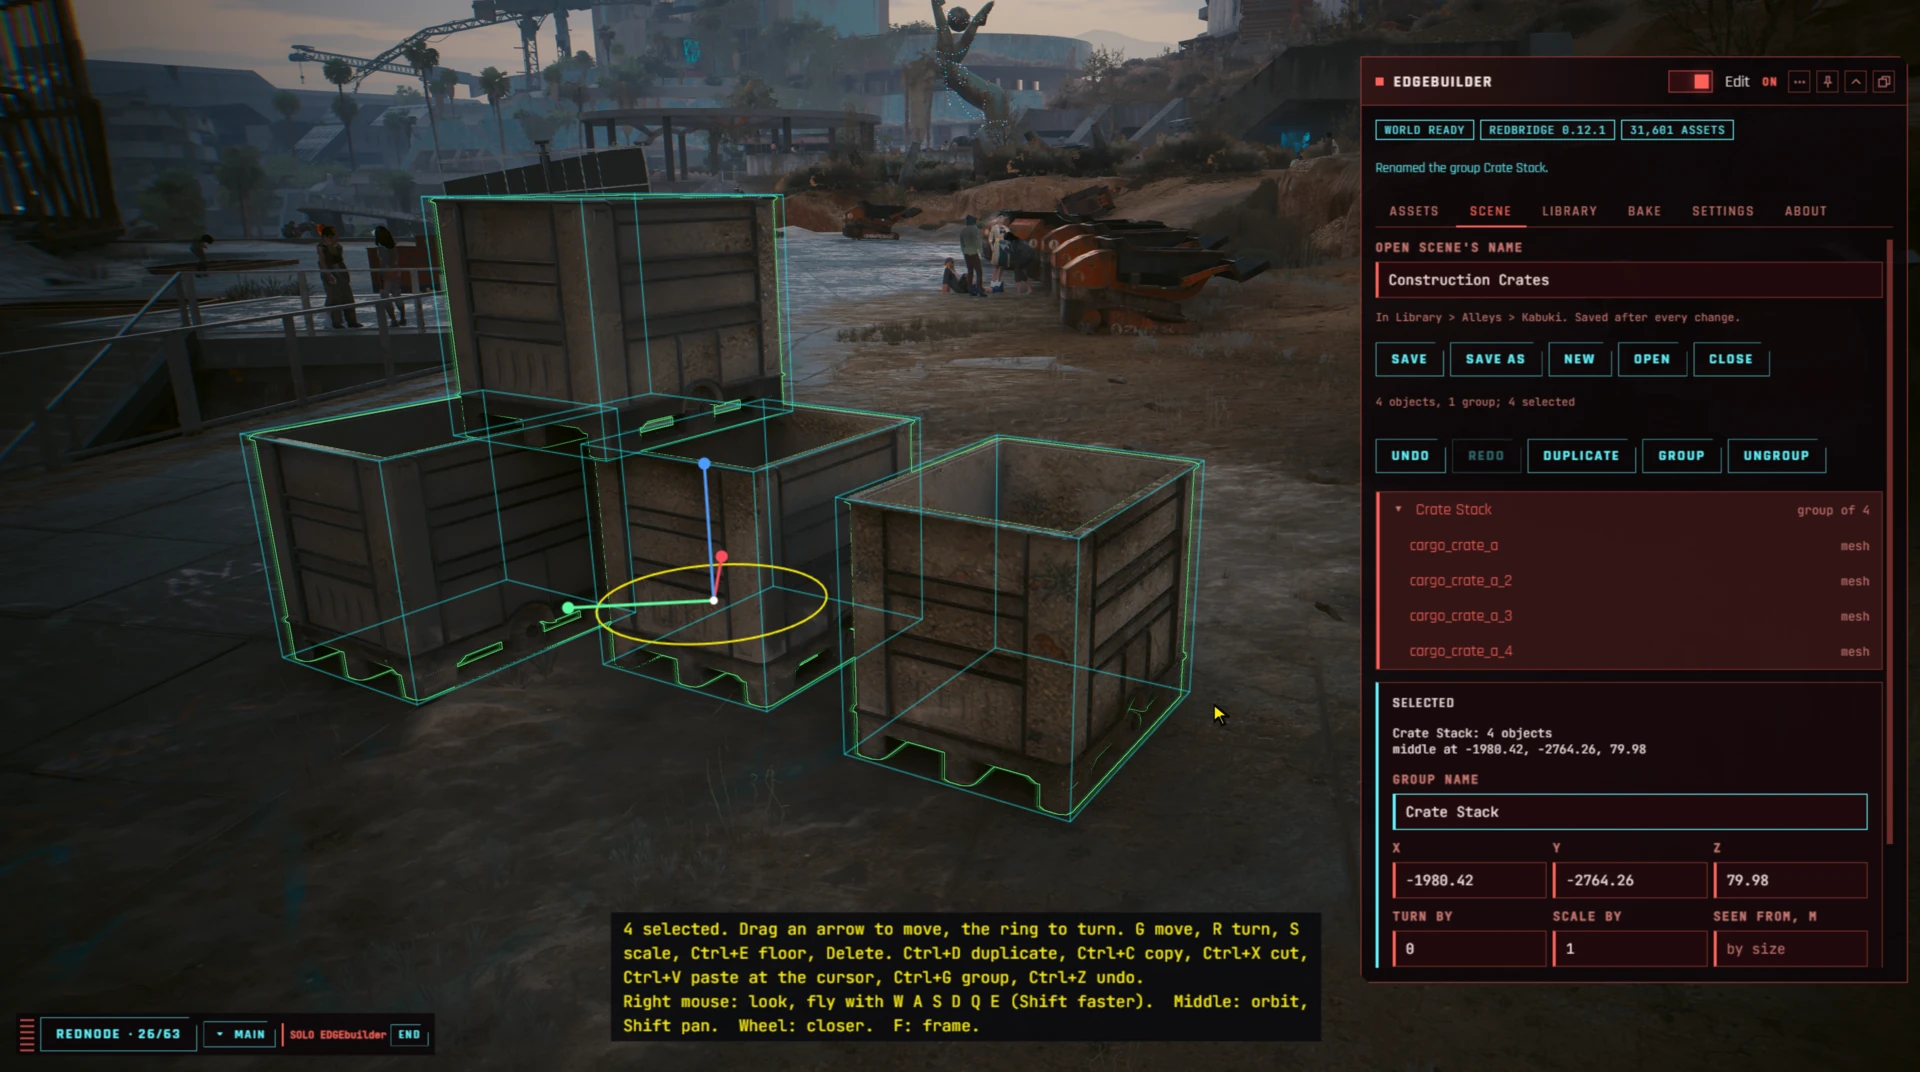
- Hold Shift and drag a box around the four crates. All four are selected; the Scene tab says 4 selected.
- Press Ctrl+G. The message says Grouped 4 objects as Group 1.
- In the Selected panel, the Group name field holds Group 1. Type
Crate stackand press Enter. - Click any one crate: the whole stack is selected. Alt+click picks one crate on its own.
In the Scene tab’s list, Crate stack shows as a folder with its four crates under it. The arrow beside it folds them away.
8. Copy the stack somewhere else
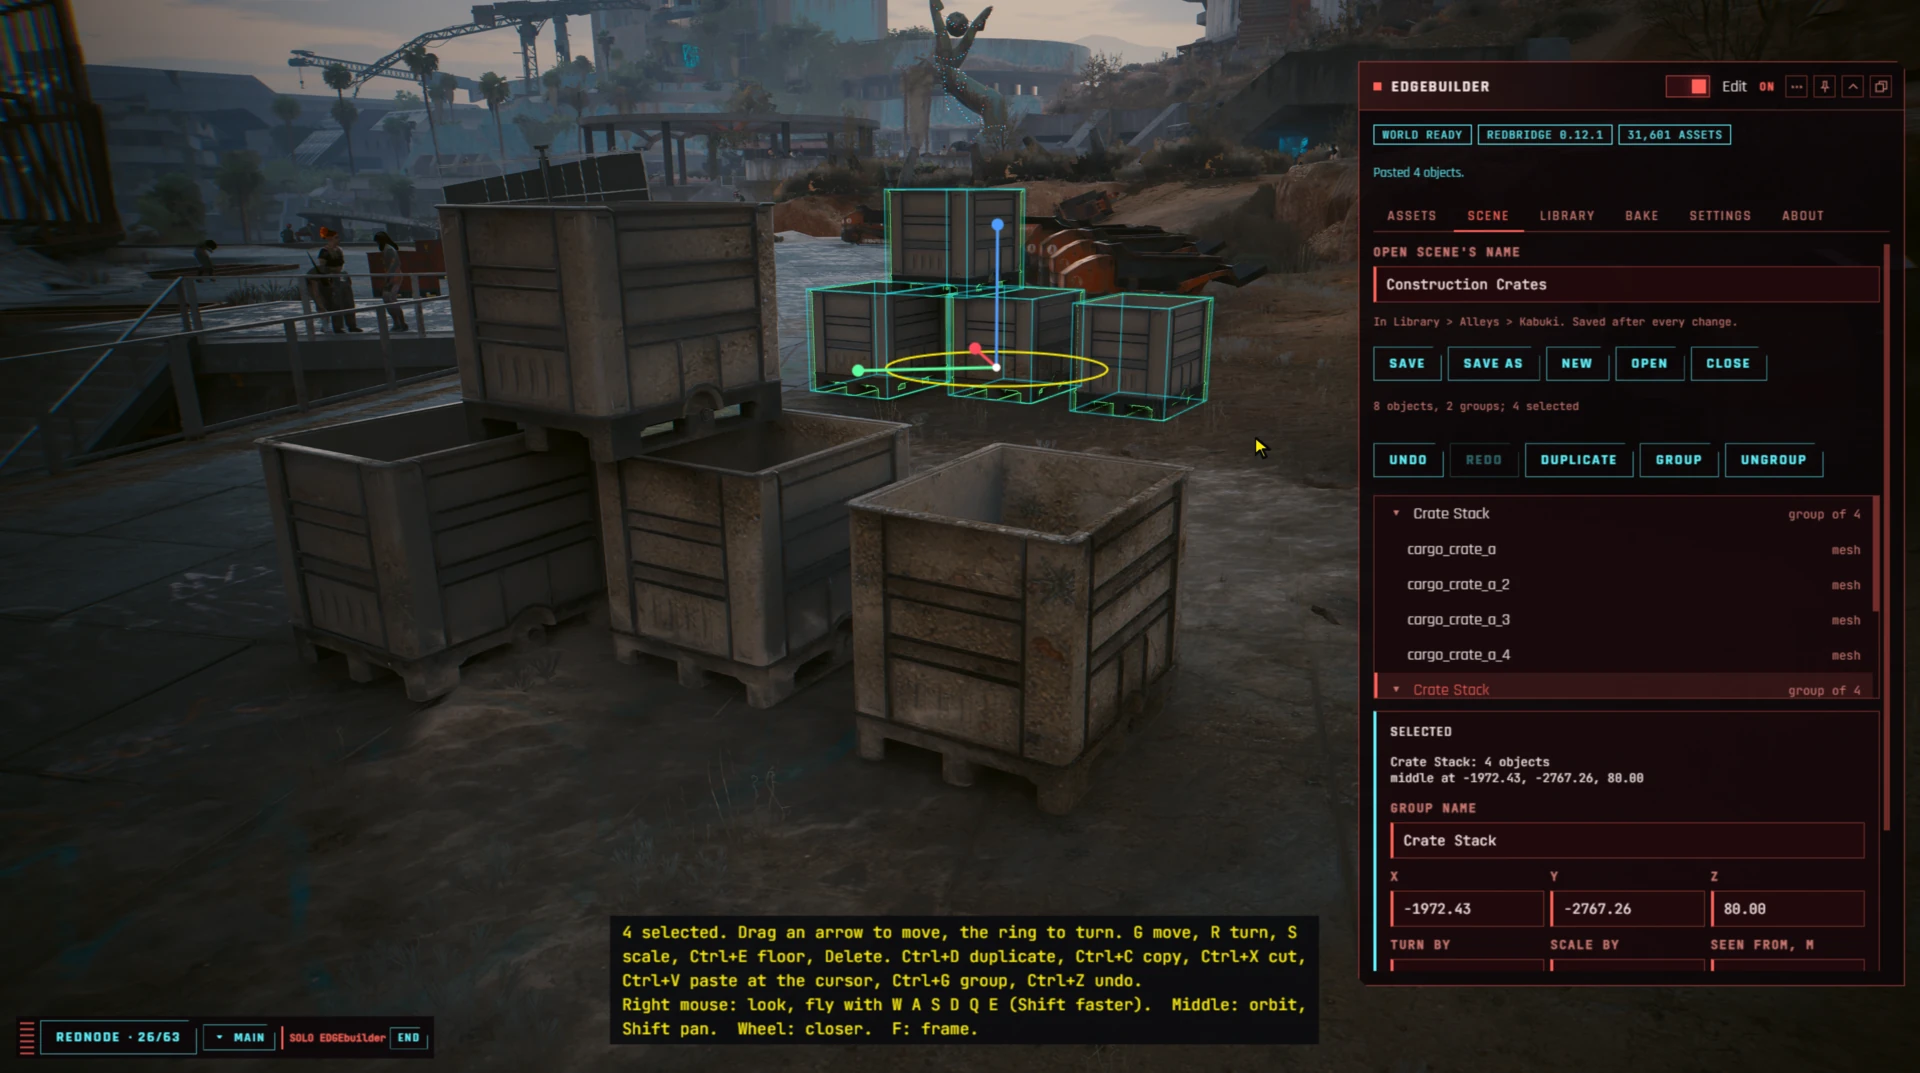
- Click the stack to select it, and press Ctrl+C. The message says Copied 4 objects. Ctrl+V pastes them where the cursor points.
- Fly a little way off, a wall’s length away.
- Point the cursor at the ground there and press Ctrl+V. A second stack lands on the ground under the cursor, already selected, as a new group of the same name.
9. Undo a mistake
- With the new stack selected, press Delete. It’s gone.
- Press Ctrl+Z. It’s back, where it was.
- Press Ctrl+Y, and it’s deleted again. Press Ctrl+Z once more to keep it.
Undo covers the last 100 changes this session. The Undo and Redo buttons on the Scene tab do the same.
Your scene has been saved after every step. Ctrl+S confirms it, and the Scene tab says where: In Library. Saved after every change.
10. Bake it into the world
So far the crates are previews: only you see them, while EDGEbuilder runs, and V walks through them. Baking writes them into your REDcode project as part of the game world, so they stand for anyone who installs it.
- Make sure your REDcode project is open in VS Code.
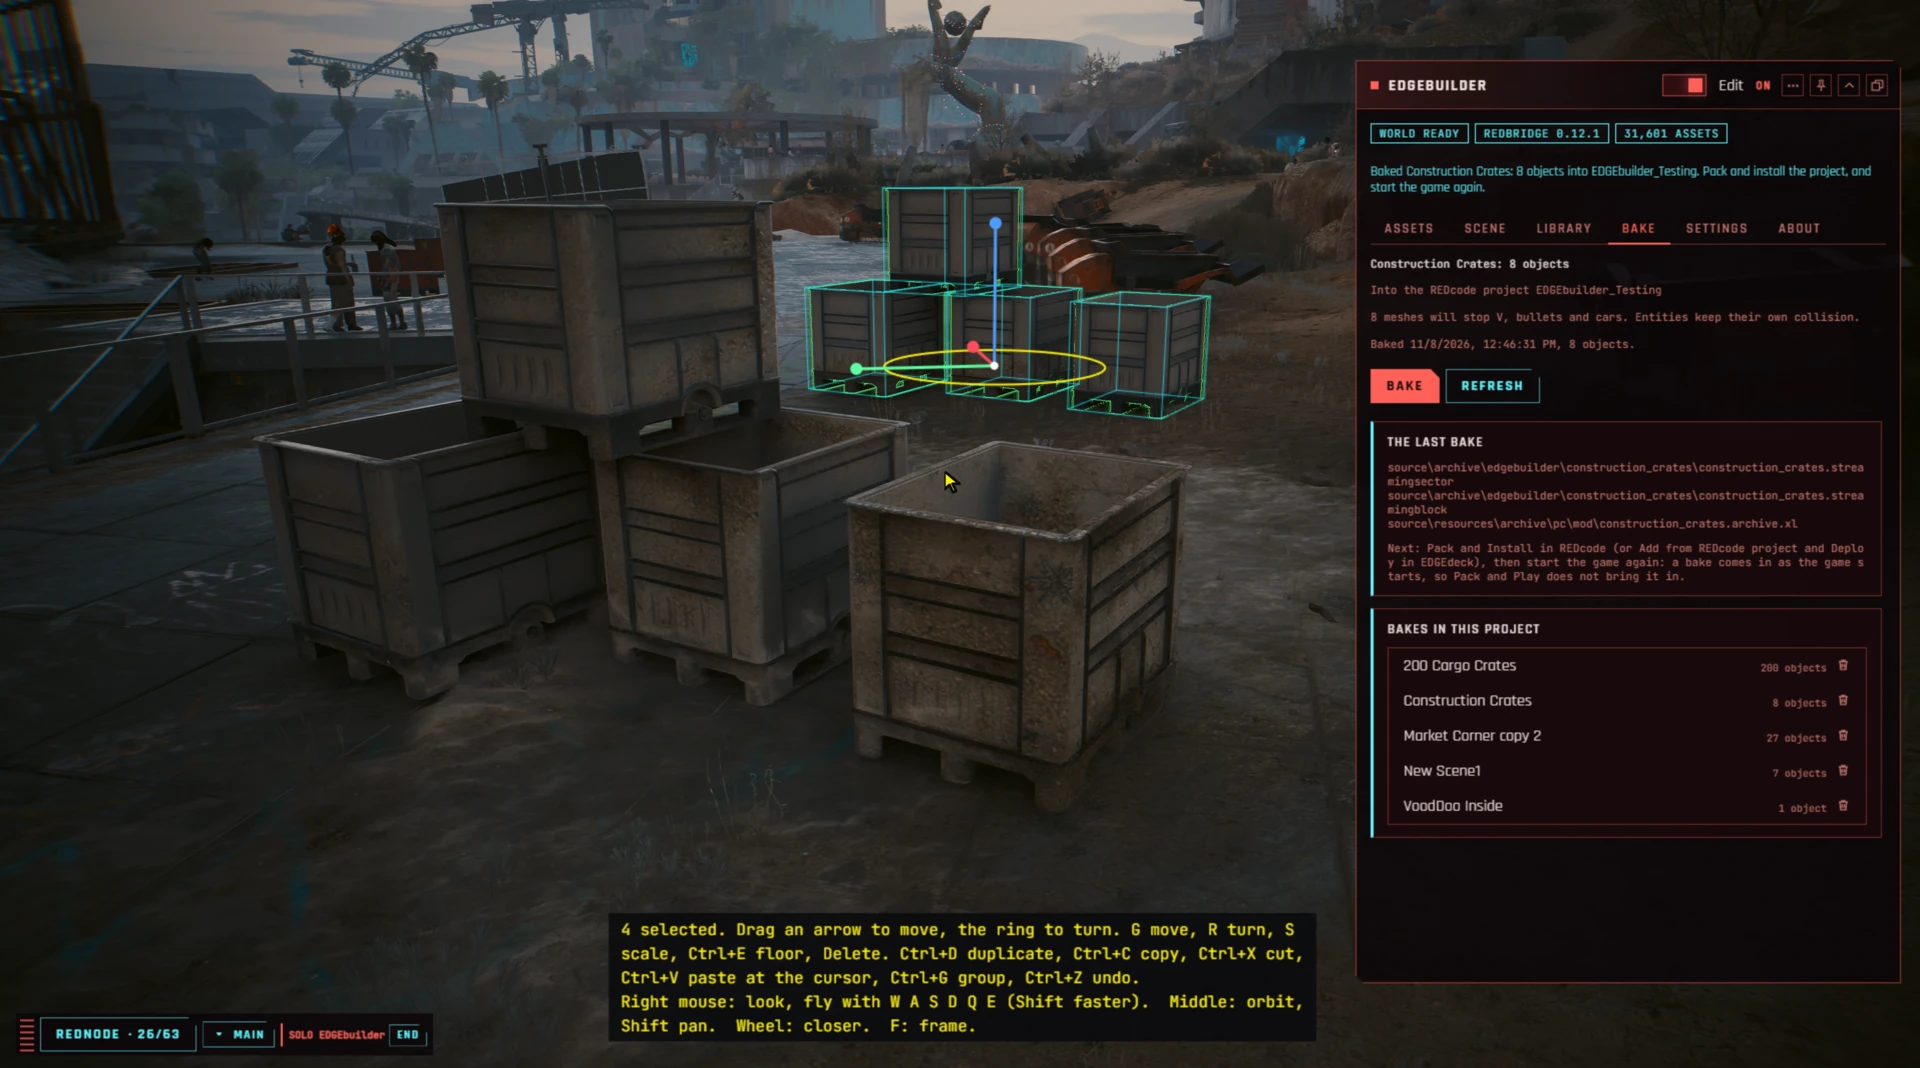
- Open the Bake tab. At the top it names the scene, Construction Crates: 8 objects, and the project it bakes into.
- Read the checks under it. One says 8 meshes will stop V, bullets and cars. Entities keep their own collision. New meshes start Solid when baked, so your crates will be solid. A red check stops the bake and says what to fix.
- Press Bake. The message says Baked Construction Crates: 8 objects into your project, and The last bake lists the files it wrote.
11. See it in the game
A bake comes into the game only as the game starts.
- Switch Edit off, and quit the game.
- In REDcode, press Pack and Install (the rocket button in the Project view). It packs the project and installs it with EDGEdeck.
- Start the game and load the same save.
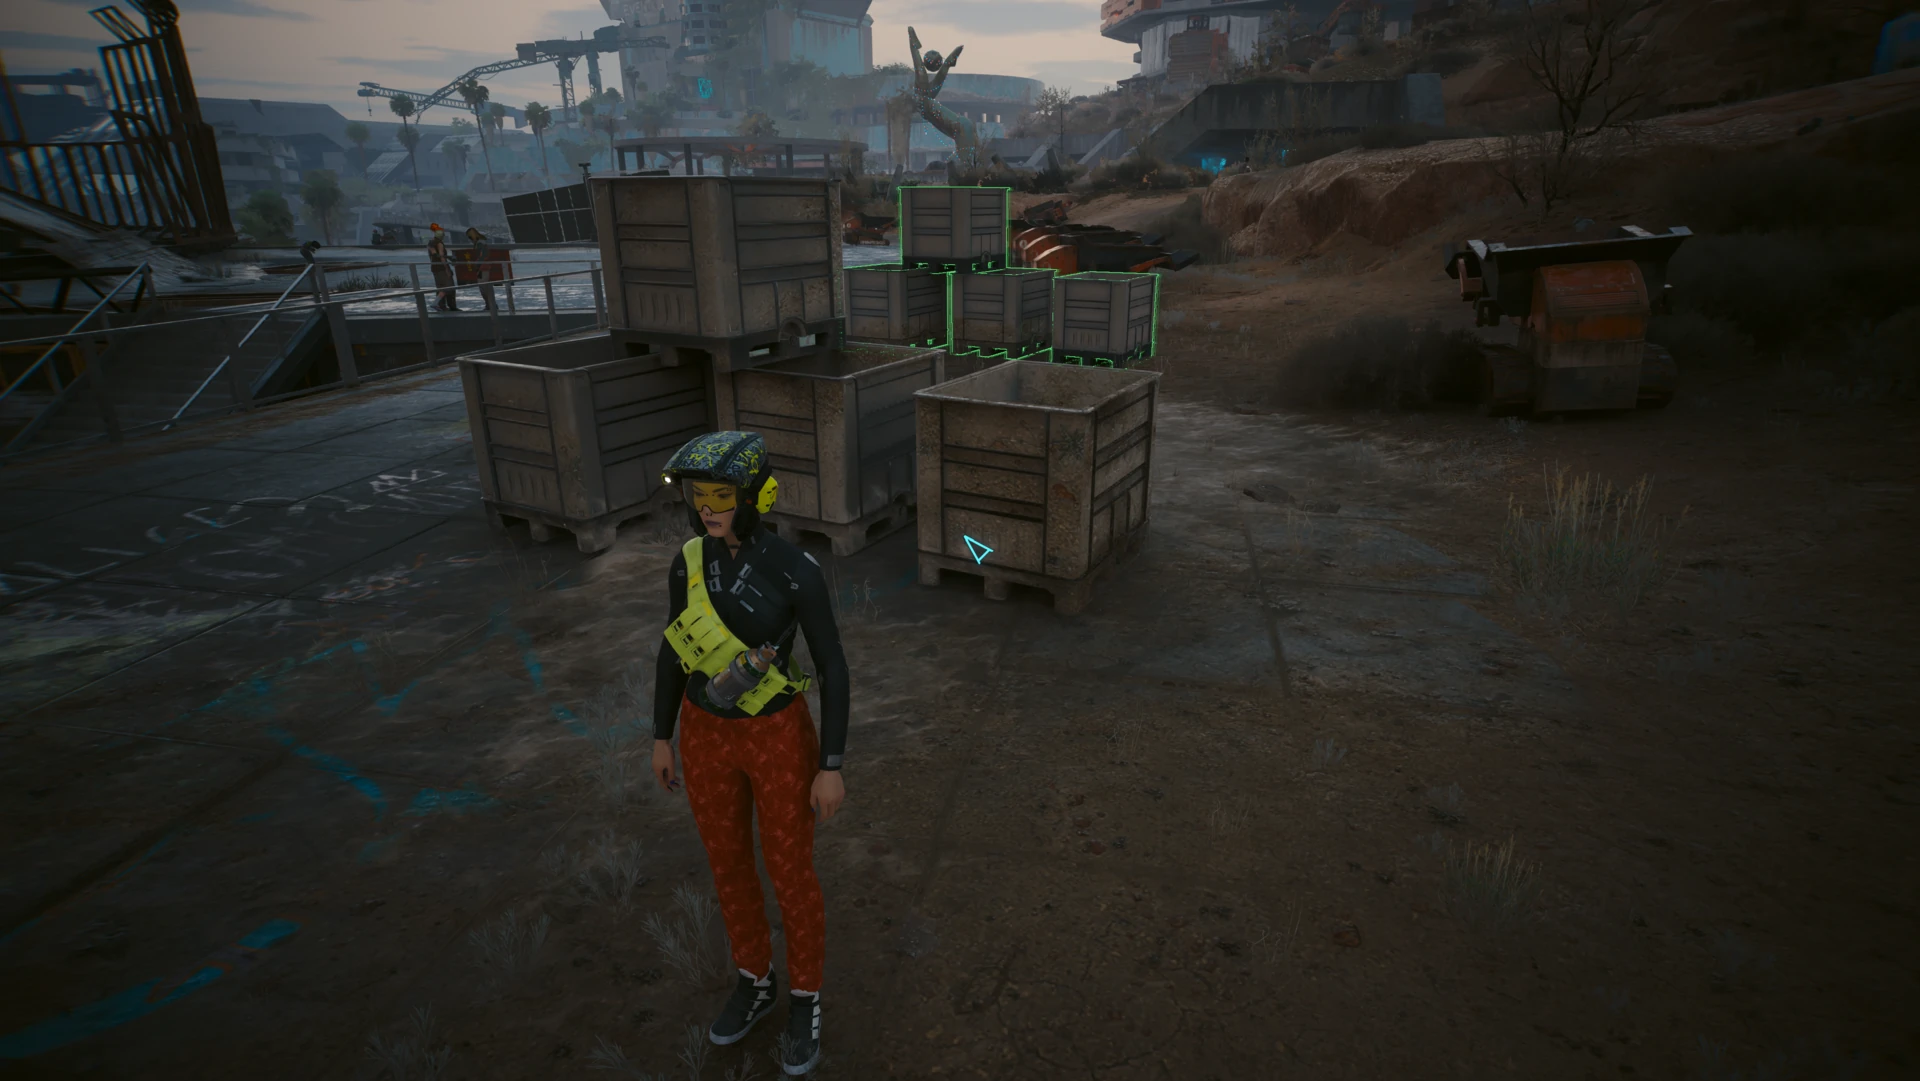
- Walk V up to the crates and try to walk through them. They stop V. So do bullets and cars.
EDGEbuilder places no previews for a scene whose bake is in the game, so nothing stands twice. The Bake tab says Its bake is in the game. Your crates now stand with EDGEbuilder closed, or uninstalled.
12. Change it and bake again
- Open EDGEbuilder, open the Scene tab and press Rebuild previews. The previews come back, so you can edit the scene. Each crate is now there twice, the baked one and its preview, so it may flicker.
- Switch Edit on, select one stack and move it a few metres.
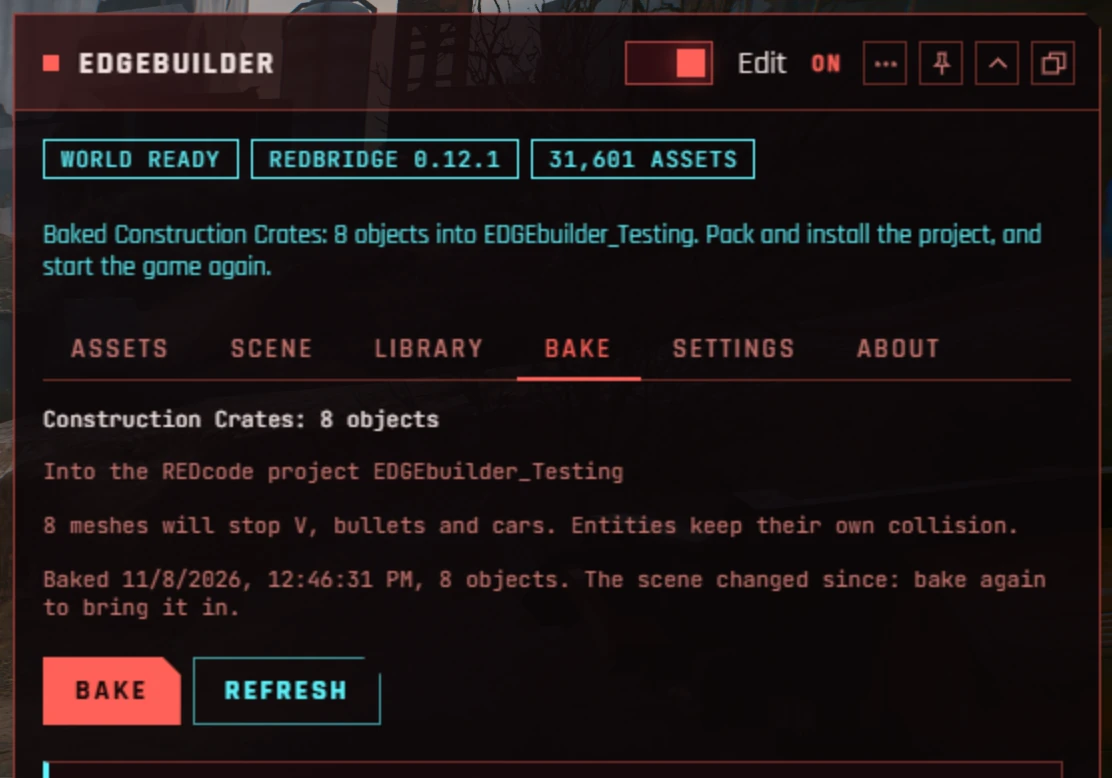
- Open the Bake tab. It says The scene changed since: bake again to bring it in.
- Press Bake, quit the game, Pack and Install, and start again.
The stack stands in its new place, with nothing left at the old one.
Where next
| To learn | Read |
|---|---|
| Every way to search, and your mods’ assets | Browsing and dropping |
| Exact moves, turns and scales | Positioning objects |
| Orbit, pan and frame with the camera | The camera and builder mode |
| Selecting, groups, copy and paste in depth | Arranging a scene |
| Keeping scenes, the Library, Solid, Seen from, taking a bake out | Scenes and baking |
| Bakes kept in the Library, for any project | Bakes in the Library |
| When something goes wrong | Troubleshooting |