Add to Project
Add to Project turns a prop on the Desk into the files the game uses, inside your mod project. After it, the prop is part of your mod: pack it, and place it in the world.
| On this page | |
|---|---|
| How | One click |
| What it writes | The files, and where |
| Collision | How the prop is solid |
| Into the game | Pack, then place |
| Changing a prop that’s already in | |
| Game materials on a part | By asking Claude, for now |
How
- Open your project in REDcode. If none is open, EDGEfab asks you to pick a project folder.
- On the Desk, right-click the prop and choose Add to Project, or press the icon at the right of its line.
It takes one to three minutes for a prop in parts: a game material is made for each part, about four textures each. A progress note names each step. At the end:
EDGEfab added Neon vending machine to NeonProps, solid (a physical mesh with a box).
Place neon_vending_machine.ent with EDGEbuilder, or spawn it.
The message has three buttons: Open in EDGEmat puts the prop’s mesh on EDGEmat’s Desk, to give its parts game materials, Pack and Play packs the mod and gets it into the game, as the same button in REDcode does, and Reveal in REDcode shows the mesh in REDcode’s Project view. Every file written is in the log (EDGEfab: Show Log).
The prop needs a size first. If the Desk says Size unknown, use Set Size.
What it writes
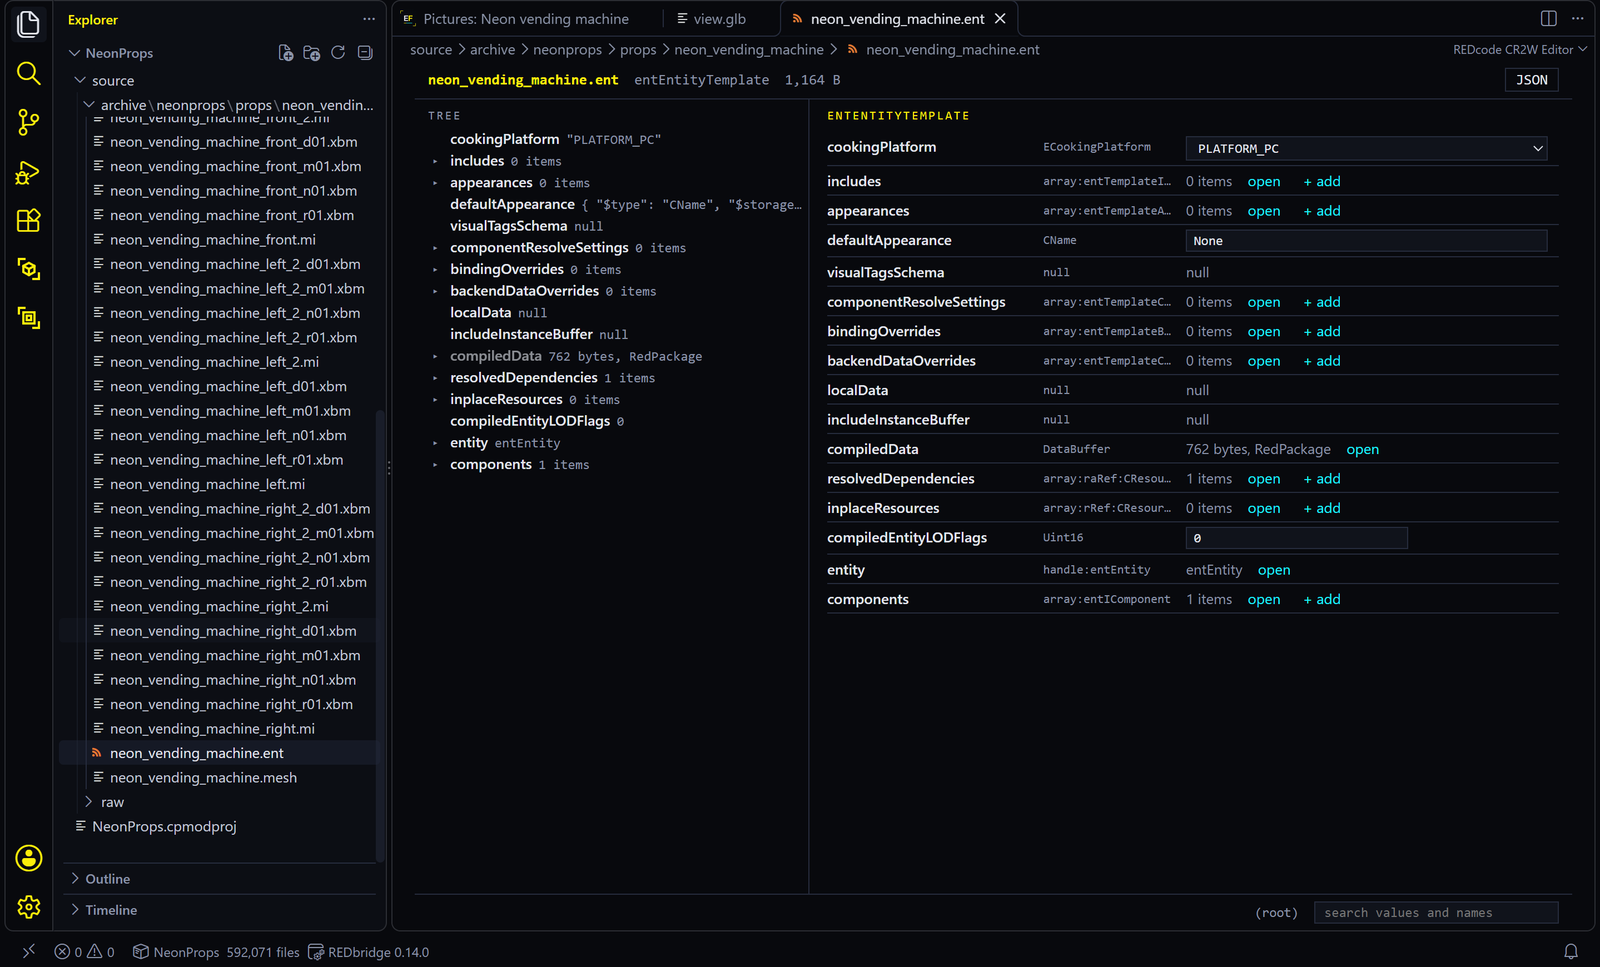
Everything goes under one folder named after your project and the prop. For a project NeonProps and a prop neon_vending_machine:
NeonProps\source\archive\neonprops\props\neon_vending_machine\
    neon_vending_machine.ent          the entity: this is what you place
    neon_vending_machine.mesh         the mesh, with its three levels of detail
    neon_vending_machine_body.mi      a material for each part
    neon_vending_machine_body_d01.xbm     its color texture
    neon_vending_machine_body_n01.xbm     its bumps
    neon_vending_machine_body_r01.xbm     its roughness
    neon_vending_machine_body_m01.xbm     its metal
    ...                               the same for front, back, base and the rest

NeonProps\source\raw\neonprops\props\neon_vending_machine\
    neon_vending_machine.glb          the prepared model
    neon_vending_machine.edgefab.json where it came from, and its license
| File | What it is |
|---|---|
.ent |
The entity. Its game path is what tools ask for: neonprops\props\neon_vending_machine\neon_vending_machine.ent |
.mesh |
The shape. It starts from one of the game’s own barrels, with everything replaced: shape, materials and collision |
.mi |
A material, made from the model’s own textures with EDGEmat’s code. A glow is written into it |
.xbm |
A texture in the game’s format |
.edgefab.json |
A record: the words or file the prop came from, the Tripo plan, the collision. Keep it: it is your proof of where the model came from |
All paths are lowercase, as the game expects. Bumps are written the way the game reads them, so raised details don’t shade as dents.
Collision
Collision makes the prop solid. The Collision setting (Settings) chooses how:
| Setting | Means | Use |
|---|---|---|
physical |
The entity has one physical mesh, with a box the prop’s size. The default | Almost always |
box |
The entity has a plain mesh and a separate box collider, as many of the game’s own props do | If another tool expects that shape |
none |
It only draws. V walks through it | Decoration out of reach |
Both kinds of box were tested in the game: V stops at them and can stand on them. The box fits the prop’s outer size, so a table is solid under its top too. A shape that follows the prop closely is not there yet.
Into the game
- Pack. Press Pack and Play on the message, or at the top of REDcode’s Project view. With the game running and REDnode’s MCP server on, the mod is swapped into the running game. Otherwise it is installed for the next start. See REDcode: pack and install.
- Place. In the game, press F10, open EDGEbuilder, then Assets, the Mods tab and Entities. Search for the prop’s name and press Drop where I look. See EDGEbuilder.
You can also spawn the entity by its game path with any tool that spawns entities.
Changing a prop that’s already in
Change the prop on the Desk (its size, its glow, a new model), then Add to Project again. The same name replaces the prop in the project. Then pack again.
It keeps what didn’t change. A material made from the same pictures as last time keeps its files, and only the changed ones are made again. The message says what was kept:
EDGEfab added Neon vending machine to NeonProps, solid (a physical mesh with a box).
4 of its 6 materials are unchanged and were kept. front keeps the material you gave it.
| Good to know | |
|---|---|
| Only the size or shape changed | Every material is kept. It takes seconds |
| A picture or a glow changed | Only that part’s material is made again. This still takes a minute or more |
| Start Over… | The button on the message, when something was kept. It makes every texture again and puts every part back on the model’s own texture. It asks first |
| After a rename | The prop goes in under its new name, beside the old one. Delete the old folder from the project |
| From the Library | A prop added from the Library is a ready copy: it takes seconds |
Game materials on a part
A prop made in parts wears Tripo’s textures on each part. Any part can wear one of the game’s own materials instead: metallic car paint on the body, the game’s vending machine glass on the shelves, a plain glow on a panel. Game materials shine and react to light as the rest of Night City does.
It is done in EDGEmat (0.3.3 or later), on the prop in your project:
- On the prop on EDGEfab’s Desk, Open in EDGEmat (its menu, or the palette icon on its line; also a button on Add to Project’s message). A prop that isn’t in the project yet is added first.
- EDGEmat’s Desk opens with the prop’s mesh, its look under it, and one row per part under that.
- Right-click a part: Use a Game Surface… (a surface, then a color), Use a Game Material…, or Back to the Model’s Texture.
- Pack and Play in REDcode to see it in the game. There is no need to Add to Project again.
Or ask Claude, with EDGEmat connected (see Assistants). For example:
In my project
D:\Mods\NeonProps, put the game’s blue emissive material on thebackpart ofneon_vending_machine.mesh, and the game’s vending machine glass on itsfront_2part.
It was seen in the game once, on a vending machine with three parts changed: red car paint, a blue glow and game glass, by day and night.
| Good to know | |
|---|---|
| Add to Project again keeps it | A part you gave another material keeps it when you add the prop again, and the message names the part |
| Going back | The model’s own material for that part stays in the project. Start Over… on the message puts every part back on its own |
| It lives in the project | The new material is on the prop in that project only. The prop on the Desk and in the Library keeps the model’s own textures |
Next: The Library, or Assistants.